I do all of my illustration work nowadays with Flash CS3 and a Wacom graphics tablet. For anyone who's curious, I've put together a tutorial on how exactly I go about producing one in color; it's generally faster than doing the same thing with Photoshop, at least for me, and since Flash is a vector format (versus Photoshop's pixel-based output), I can render out the final version at any size and resolution needed, reuse pieces easily, and more.
I don't think very many other working artists use Flash this way, which probably says more about my ignorance than anything, but for what it's worth, here's what I do. You'll need a working knowledge of Flash to follow along with the particulars.
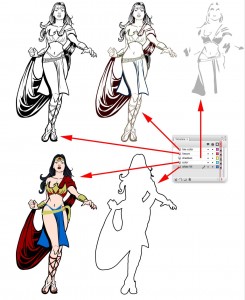
Essentially the goal is to produce a file with at least five layers -- one for just the black and white line art (no fills); one for a white backing that fills in all the line art area (so you can layer backgrounds behind it, produce just the illustration on a transparent background, etc.); line color (only the lines are colored, no fills); fill color; and shadows. Depending on what I am doing, I might also have one or more layers for the background or surrounding elements, and possibly a "highlights" layer as well, but those five are the essentials.
Here's how our sample illustration looks broken out, along with the way the timeline is set up:
The first and most critical step is the line art. I draw directly in Flash using my Wacom tablet, which makes everything a lot easier. The key part is to ensure that your line art is continuous along the perimeter of the illustration. That makes it a lot easier to do the fill later. You also want to make sure your line art isn't filled with white or any other color -- it should be on its own layer, just the black lines themselves, with everything else transparent:

After you have your line art the way you want it, create a new layer named "white fill". Copy the line art and paste it in place on the new layer (Command-Shift-V) to ensure the two layers are perfectly aligned. Select all (command-A) and group it (command-G). This makes an object out of the line art on the "white fill" layer.
Select the rectangle tool, with a white fill and any line color you want. Draw a rectangle that completely covers the line art object you just made.
Now select the line art object and Break it (command-B). The line art merges with the white-filled rectangle. Click on any part of the white fill that's outside of the line art, then hit Delete.
You're now left with the black line art, all filled with white. Delete any interior spaces that aren't part of the illustration (in this example, the spots between her cape and hips, under her arms). Select all again, and fill with white. You now have a white object that precisely underlies the line art. This ensures that any background elements you put beneath the figure will now show through, while keeping flexibility if down the road you need to change the line art in some way. If you kept the white fill merged in with the black on one layer, you'd have to remove all the white any time you wanted to change anything, which is a pain.
Here's how the white fill layer looks (I used gray so it would show up against the canvas):

Next, create a new layer named "color". Copy the line art and paste it in place on the new layer (Command-Shift-V) -- that ensures your color and line art align precisely. It's usually easiest just to use your paint bucket tool to fill in the existing areas with the desired color. Other times you may want to switch to the paintbrush and fill them in by hand, like I did with the belt. It doesn't matter if you color over the lines, because the "lineart" and "line color" layers overlay this layer, covering any such mistakes.
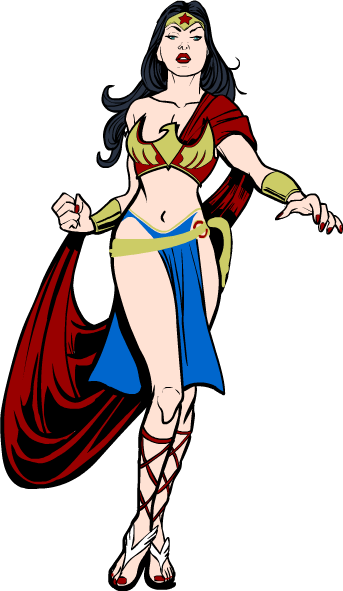
The trickiest part comes next, the line color. This is optional, however, used when you want an extra layer of visual interest, or a more traditional animation cell kind of feel.
Once again, make a new layer, this time called "line color". Again copy the line art, and paste in place. Select the Brush tool, and in your tool bar, click the "Brush mode" option. Choose "Paint inside", which allows you to paint only on the color you initially click on with the brush. To use it, position the brush icon over whatever line you want to be the current color, then click and hold. Wiggle your brush around however you like, and when you let go, only the color areas that match the bit you initially clicked on will take the color. Anything outside that color, or on a transparent bit of the layer, will simply disappear as if you didn't color there at all.
Combined with the fill bucket and selection lasso, you can quickly get all the line color how you want it. I usually choose a deeper, darker shade of whatever the primary color fill is (darker flesh, darker red for the cape, etc.), as you see in the separation:
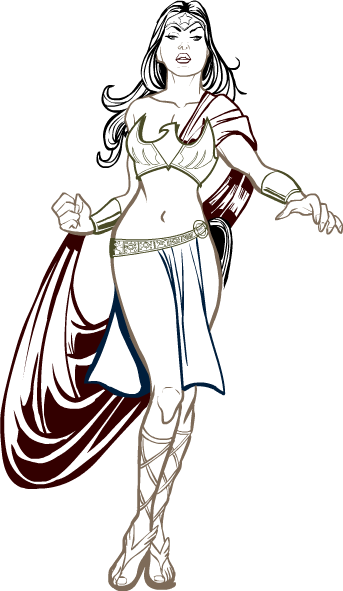
Finally, another optional layer, the shadows. You could just do the shadow colors built into the color layer, but I find that causes a lot of trouble down the road if you decide you aren't happy with your initial color choice. Keeping shadows separate lets you change that underlying color once, instead of having to click on every single main color area AND every shadow bit that goes with it.
You start the usual way, creating a new layer (this time named "shadows"), but this time you don't want to cut and paste the line art.
Choose the brush tool (remember to set the Brush Mode back to "Paint Normal" if you switched it for coloring the line art), with a color of black at an alpha of 30%. Now just brush in the areas you want to be shaded:

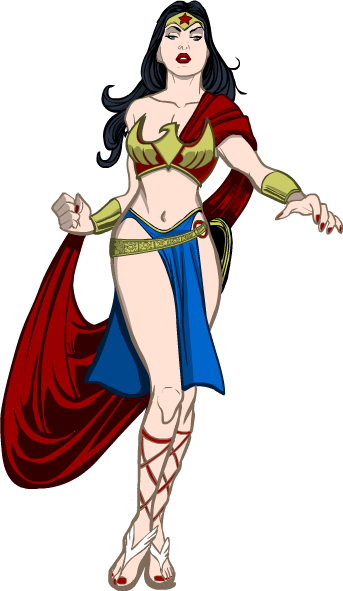
And with that, you're done! Here's how the image looks all together:
If you're curious, you can get the Flash source here. Good luck if you want to try it out, and feel free to contact me with any questions about this technique either via email, the "Contact Us" form here at HeroMachine.com, or by comments to this post.

